Configure your Ricoh MFP
The Ricoh MFP uses the Ricoh browser unit to connect to Udocx. In most cases, the Ricoh browser is an optional software component that must be installed on the device. Before attempting to configure your Ricoh MFP device for Udocx, verify that your device has Internet connectivity. Once confirmed, continue with the configuration of the MFP and then connect the device to the Udocx service.
Steps
1.Confirm that the MFP device can access the Internet. Attach a laptop to the network cable used by the device and ensure that you can access https://mfp.udocx.com and other websites like http://www.google.com. If you are unable to access the Internet, you will need to resolve the issue before proceeding with the Udocx configuration.
NOTE: These steps may vary slightly depending on the exact model of your Ricoh MFP and the firmware revision of the device.
2.The Device Browser is a web browser application that can run on a Ricoh device. The Device Browser consists of the browser engine module and the Ricoh extended JavaScript processing module. With the browser engine module, the Device Browser obtains HTML files from a server and displays them on the operation panel of the device. With the Ricoh extended JavaScript processing module, the Device Browser controls the scanner of the device through Ricoh's extended JavaScript.
If not already available on your device, the Device Browser comes on an SD card which can be installed on the MFP. Contact your Ricoh reseller to obtain the Ricoh Device Browser unit.
3. Udocx requires the following Ricoh browser support options to be enabled:
- Cookies
- Extended Java Script
4.From your desktop web browser, enter the IP address of the Ricoh MFP and log in as an administrator.
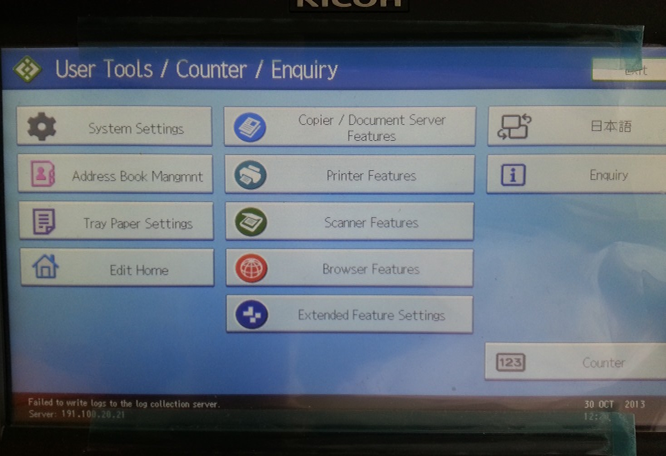
5.Go to the Extended Feature Settings and click on Extended Feature Info.
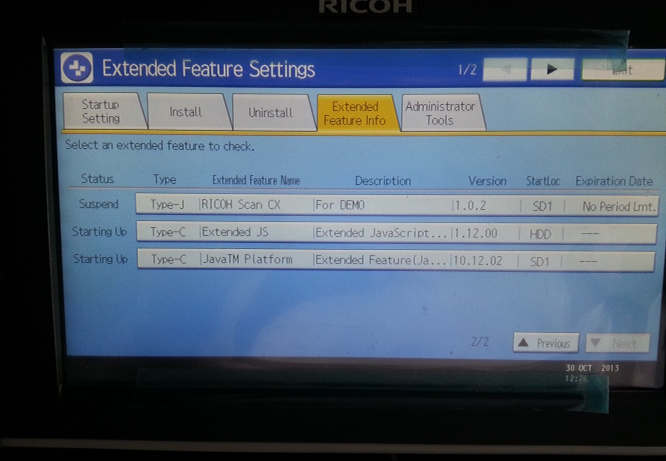
Verify that Javascript is installed and running. If Javascript is not in the list you will need to verify it is active.
Click on the Administrator Tools tab and verify HTTP and HTTPS are active.
Web Services Settings
- HTTP (Active)
- HTTPS (Active)
Go to "Browser features" > "Bookmark" > "New Program" > "Title" (Udocx) > URL (https://mfp.udocx.com)
- Use Cookies (Turn On)
- Javascript (Active)
- Extended Javascript (Active)
6.You will need to obtain the serial number of the Ricoh MFP for use in the Udocx account setup. Go to "Enquiry" and write down the serial number.
7.Go to Edit Home Menu:
- Add Icon
- URL tab
- Select Udocx
- Select blank area where you want to add the icon
- Click ok
Now the Udocx icon will appear on the screen.